Just Launched! — Create Consistent Product Management Workflows Across Your Teams
Flexibility and consistency. These words can seem to be at odds with each other — especially when applied to product management practices. You want to make your processes your own. But you also want everyone to follow the same approach. It is a good thing that Aha! allows you to do both.
Imagine that you are the VP of product management at a company with 2,000 employees and 10 different products. You just added five products as part of a recent acquisition. (Congrats!) Naturally, you want all of the new product teams to use the same custom product management workflows that your existing teams use. Otherwise? Chaos and duplicate effort are in your future.
In the past, your Aha! account Administrator needed to manually add workflows for each type of record (goals, initiatives, releases, master features, features, and requirements) for newly added products. This meant that, for the scenario above, they would have needed to do the same. It worked, but it was not an efficient process to recreate workflows for new products.
You can now define custom workflows in Aha! and select them as the default setting for new product lines and products — ensuring a consistent approach across all teams.
You can set your defaults at the account level, so when new products are added, they automatically are configured. Note that the default workflows are only applied to newly added products — they are not applied to existing ones, which will still need to be updated individually.
Here is how you can set default custom workflows across your account:
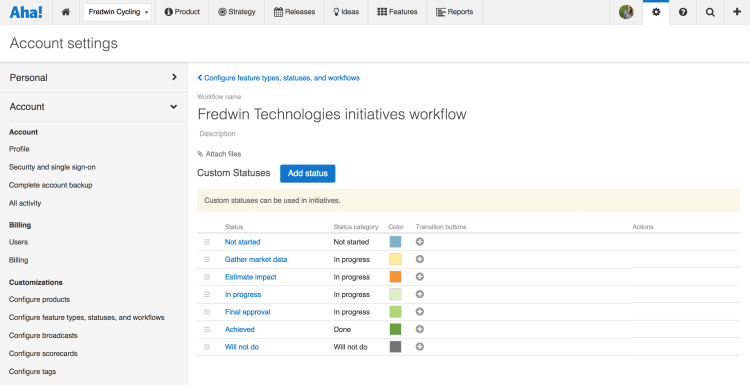
Define custom workflows for each record type Customize the status names, colors, and transitions for each record type — including goals, initiatives, releases, features, and ideas. This is useful because the steps to complete a large work item, such as a master feature, can be quite different from a smaller item, such as a requirement. These defined workflows encourage a uniform approach so that the team can work more efficiently.

For a customized initiative workflow, consider clear status names, such as “Gather market data,” “Estimate impact,” and “Final approval.”
Set defaults for each record type Once your preferred workflows are defined, navigate to Settings Account Configure feature types, statuses, and workflows. To alter your account’s default workflows, select Change default settings by the custom workflows that you want to use. These workflows will be automatically applied when new product lines and products are added so teams can get up and running quickly.
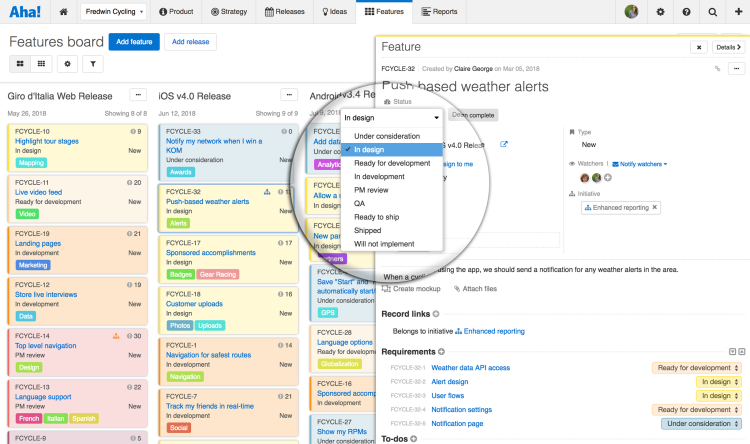
As you define the default workflow for features, consider clear status names, such as “In design,” “Ready for development,” or “Ready for PM review.”
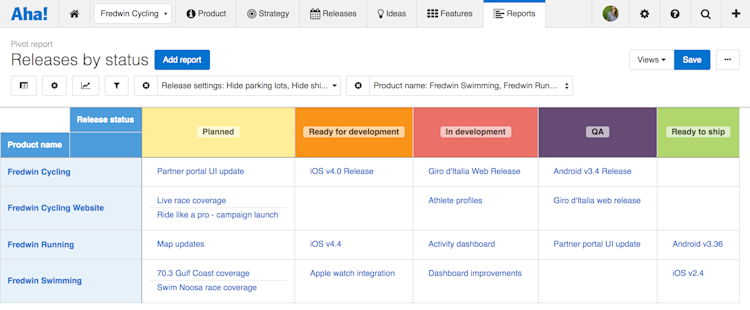
Create consistent progress reports across the portfolio With default workflows in place, you can now get a clear picture of statuses across the entire portfolio. Set a custom color for each status and include this information in your reports to quickly visualize progress in a single view.

Use a pivot report to show the status of releases across multiple products.
Please note that if you have integrated Aha! with a development tool (e.g. Jira, Rally, or TFS), any changes you make to your workflow statuses may impact your field mappings. Check your integration configuration to make sure that your status fields correspond correctly.
Work the way you want and continue to have the best of both worlds: flexibility and consistency.
To take advantage of even more customizations, learn how to add custom fields, change terminology, and manage in-app notifications.
Sign up for a free Aha! trial — be happy Setting default custom workflows is available to all Aha! customers. If you are not already an Aha! customer, you may want to sign up for a free 30-day trial of Aha! now to see why more than 150,000 users trust Aha! to set product strategy, create visual roadmaps, and prioritize releases and features.
